Where a smoke alarm belongs
Installation rules are geometry: how close to a wall, how far from a corner, what a ceiling slope does to the air, and how much floor area one device can reasonably cover. Get the geometry right and a mid-range alarm outperforms a premium one mounted badly.
The rules below summarise the principles common to EN 14604, EN 54-7, BS 5839-6 and NFPA 72 practice. Numbers differ between standards and between building types, and your local code overrides everything on this page. Always follow the installation instructions supplied with the product.
The rules that apply in almost every case
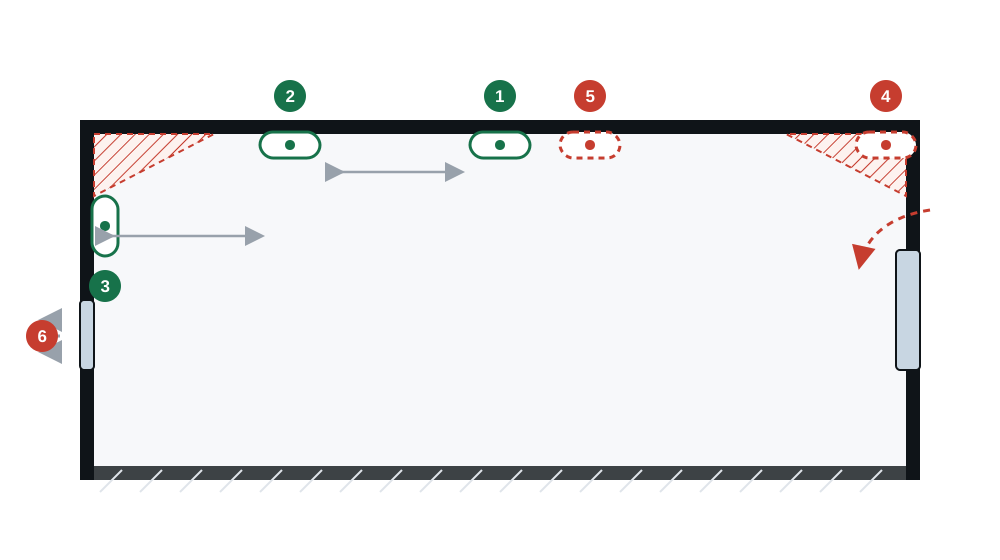
- Mount on the ceiling, as close to the centre of the room as practical — that is where smoke arrives first and where air moves most.
- Keep at least 30 cm clear of any wall and of any light fitting, and keep the sensing element out of the dead-air space within about 10 cm of the ceiling-to-wall junction.
- On a wall, mount between 30 cm and 50 cm below the ceiling and again at least 30 cm from adjacent corners.
- Keep at least 1 m from air-conditioning vents, ceiling fans, ducted air outlets, doors and windows that create draughts.
- Fit an alarm in every circulation space and inside every room where somebody sleeps.
- Interlink everything, so that an alarm in the basement wakes someone on the top floor.
- Never fit a smoke alarm inside a kitchen, bathroom or shower room — use heat detection or relocate the alarm outside the door.
How many devices, and how far apart?
Two complementary rules govern spacing: a maximum distance between devices, and a maximum distance from any point in the room to the nearest device. British residential practice uses 7.5 m for smoke detection and 5.3 m for heat detection; NFPA 72 uses a 9.1 m (30 ft) spacing for smoke detectors on smooth flat ceilings, with adjustments for ceiling height and slope. A useful sanity check for ordinary residential rooms is to treat roughly 70 m² of flat ceiling per smoke alarm as generous.
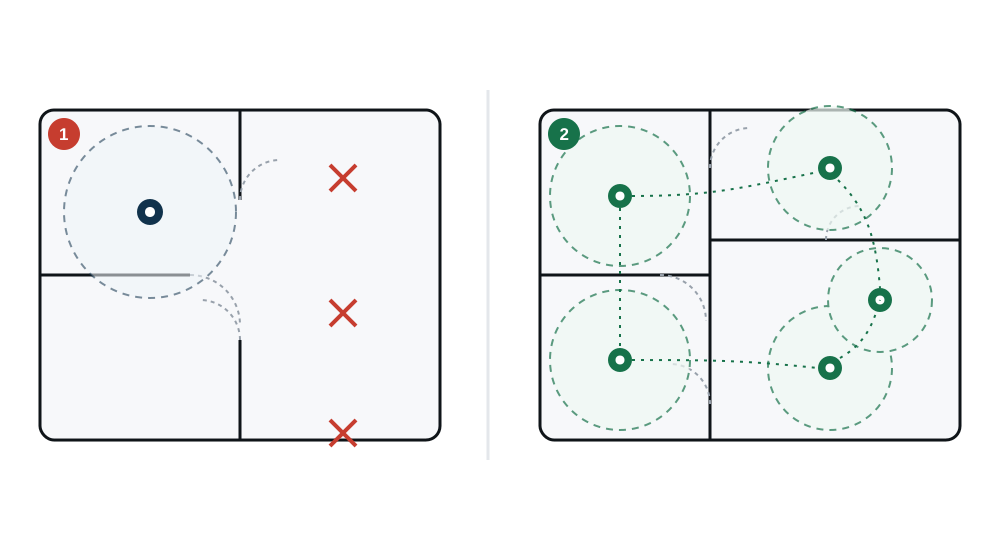
The coverage calculator turns floor area, storey count and bedroom count into a device count, and shows the spacing rules it used.
Room by room
| Room | Device | Position notes |
|---|---|---|
| Hallway, landing, corridor | Optical smoke | The highest-priority location. Ceiling, roughly central, away from stairwell draughts. |
| Each bedroom and sleeping room | Optical smoke, or optical + heat in dusty rooms | Ceiling, centre-ish, clear of wardrobe tops and draughts from windows. |
| Living room, lounge, dining room | Optical or dual-sensor | Ceiling centre. If the room is large, treat it as two coverage areas. |
| Kitchen | Heat detector, or an optical alarm mounted outside the kitchen door | Never place smoke sensing directly above or within about 3 m of a hob. |
| Bathroom and shower room | None inside, or a heat detector if required | Steam is the enemy. Protect the corridor outside the door instead. |
| Garage, workshop, utility room | Heat detector, or an environment-rated alarm | Dust and exhaust fumes cause persistent nuisance alarms with smoke sensing. |
| Loft, attic, boiler room | Heat detector or environment-rated alarm | Temperature extremes; check the rated operating range before specifying. |
| Stairwell | Optical smoke at the top of the stair | Smoke rises; the head of the stair is a chimney. Interlink with all floors. |
Sloped and unusual ceilings
- Sloped ceilings — place the device roughly 900 mm (3 ft) horizontally from the apex, measured along the ceiling, where the thermal layer is still thick. Do not put a single device at the very peak; the dead air there can delay response.
- Beamed or coffered ceilings — a beam deeper than about 10 % of the ceiling height, or deeper than 300 mm, acts as a barrier. Treat each pocket as its own room and expect to need more devices.
- Ceiling heights above about 3 m — standard point detection slows down as the smoke has further to travel. Above roughly 4.5 m, expect to need either closer spacing or a different technology such as beam detection.
- Suspended ceilings and voids — a void above a suspended ceiling is a separate fire compartment and may need its own detection in a commercial design.
Wiring, power and interlinking
- Take the supply from a permanent, regularly used lighting circuitNever a switched socket, never a circuit that can be isolated without warning. In most codes, a dedicated fused spur from a lighting circuit with a means of isolation is the accepted arrangement.
- Do not share the circuit with noisy loadsOld fluorescent ballasts and heavy switching equipment on the same circuit have historically caused false triggers and can inject interference into an interlink conductor.
- Keep interlink conductors within their permitted lengthManufacturers specify a maximum interlink cable length and a maximum number of interconnected units. Exceeding it produces devices that simply do not talk to each other.
- For wireless units, plan the radio pathPair every device to the network, then test from the furthest room. Reinforced concrete, metal-clad walls, lift shafts and large steel racking all attenuate sub-GHz and 2.4 GHz links.
- Commission, then recordTest every device from its own button and then test the interconnection by triggering one unit and confirming all the others sound. Write the installation date, the model and the replacement-due date on the label.
Anything involving fixed wiring, a consumer unit, a listed or historic building, or a commercial system that must be certified. In many jurisdictions mains-powered interlinked alarms must be installed by a qualified electrician for the installation to comply, and for rental property the certification trail matters as much as the hardware.
Check your own plan
The placement checker lets you click positions on a floor plan and see the verdict for each one — useful before you put a ladder up.
Next: keeping the installation working
Weekly tests, cleaning, battery strategy and the ten-year replacement rule.